Building your own plant stand can be an exciting way to enhance your gardening space, especially when you’re trying to create a visually appealing vertical garden without breaking the bank. With gardening season upon us, I’ve found myself craving a touch of creativity in my outdoor space. That’s why I put together this post: to inspire you to take on some simple, budget-friendly projects that will elevate your gardening game.
Whether you’re a seasoned gardener or just starting out, this guide is for anyone looking to brighten their home with greenery while keeping costs low. If you’ve ever felt overwhelmed by expensive garden decor options, you’re not alone. Many of us want to incorporate plants into our spaces but hesitate due to budget constraints. You’ll discover nine easy DIY wood plant stands that are not only affordable but also add charm and character to your home.
In this article, you’ll find an array of cheap plant stand ideas that will help you create customized homemade plant holders. Each project is simple, requiring minimal materials and tools, making them perfect for budget-friendly gardening projects. So, gather your supplies and get ready to transform your plants into stunning focal points with these wooden plant stand tutorials!
Key Takeaways
– Discover nine DIY wood plant stands that are affordable and easy to build, perfect for enhancing your garden space.
– Explore different styles like rustic ladder stands and minimalist tiered options to suit your home decor.
– Each project requires minimal materials, making them budget-friendly and accessible for all skill levels.
– Learn how to repurpose items like crates and pallets to create unique plant holders that reflect your personality.
– Find practical tips on customizing your stands to fit various plant sizes and styles, ensuring your greenery shines.
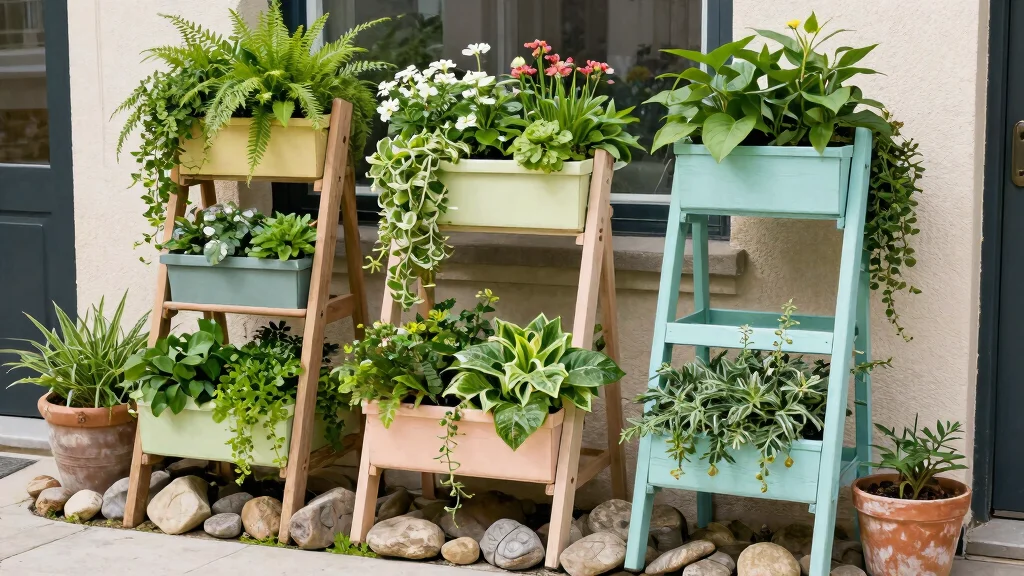
1. Rustic Ladder Plant Stand
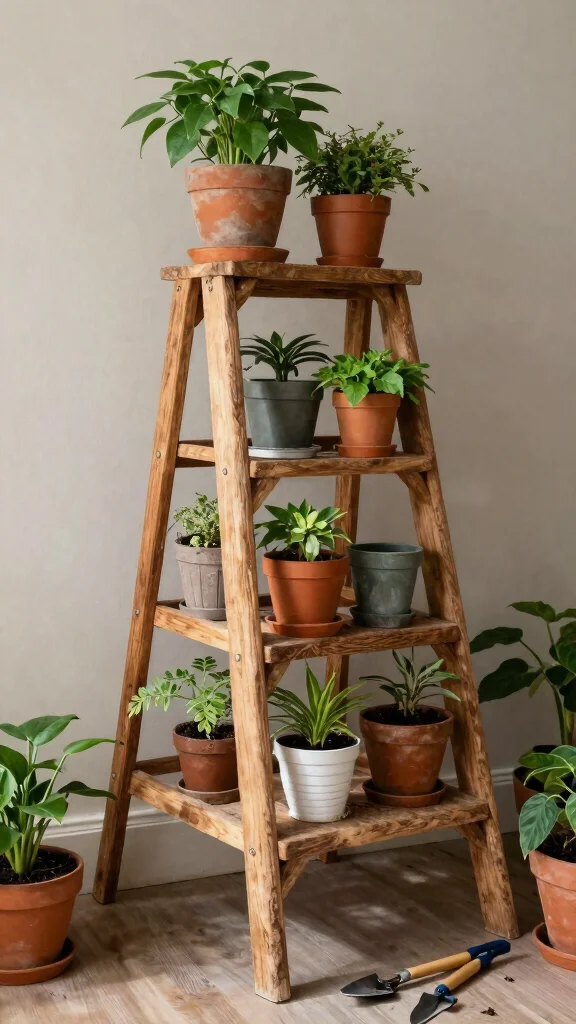
Embrace the beauty of rustic design with a ladder plant stand, perfect for displaying your plants in charming layers. The vertical arrangement offers a delightful way to create depth and interest in your home, making it feel more alive. By using wooden planks, you can easily craft a stand that highlights your greenery while adding a warm touch to your decor. Leaving the wood in its natural state or applying a light stain can enhance its rustic appeal, making it a stunning focal point in any room.
To make the most of this design, consider using reclaimed wood for an eco-friendly twist. You can also personalize the stand by adding hooks for hanging planters or decorative items. If stability is a concern, anchoring it to a wall will ensure it stands strong and secure.
Here are some ways to enhance your rustic ladder stand:
– Pair with trailing plants for a cascading effect.
– Install small shelves between rungs for extra display space.
– Use flower pots in earthy tones to complement the wood.
This design not only brings a rustic charm to your space but also allows for seasonal plant swaps, keeping your decor fresh and inviting.
Rustic Ladder Plant Stand
Editor’s Choice

Wood Carving Kit Whittling Kit: Deluxe Wood Carving Tools Knife Set with…

Minwax 220904444 Wood Finish, Natural Stain, Half Pint
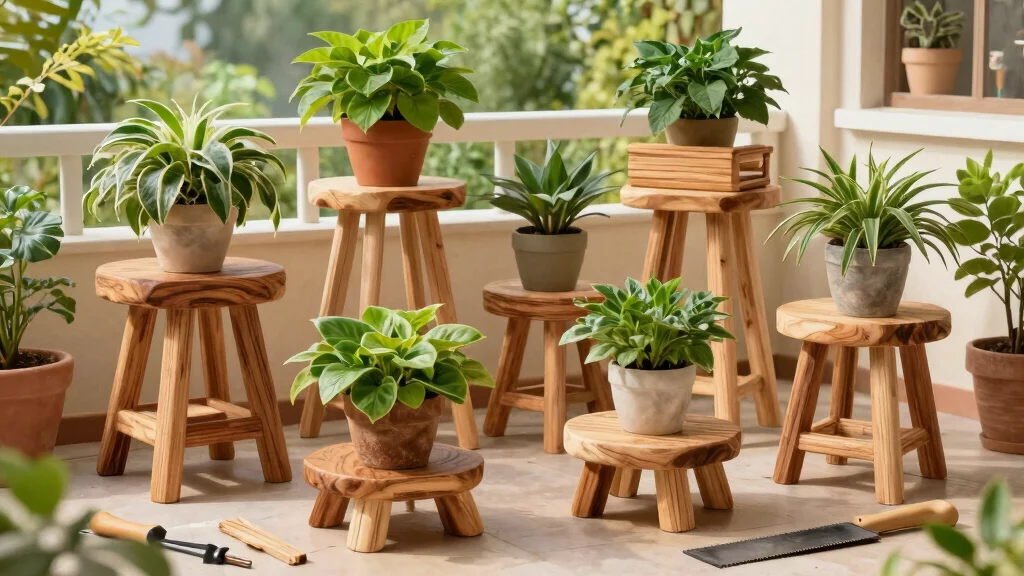
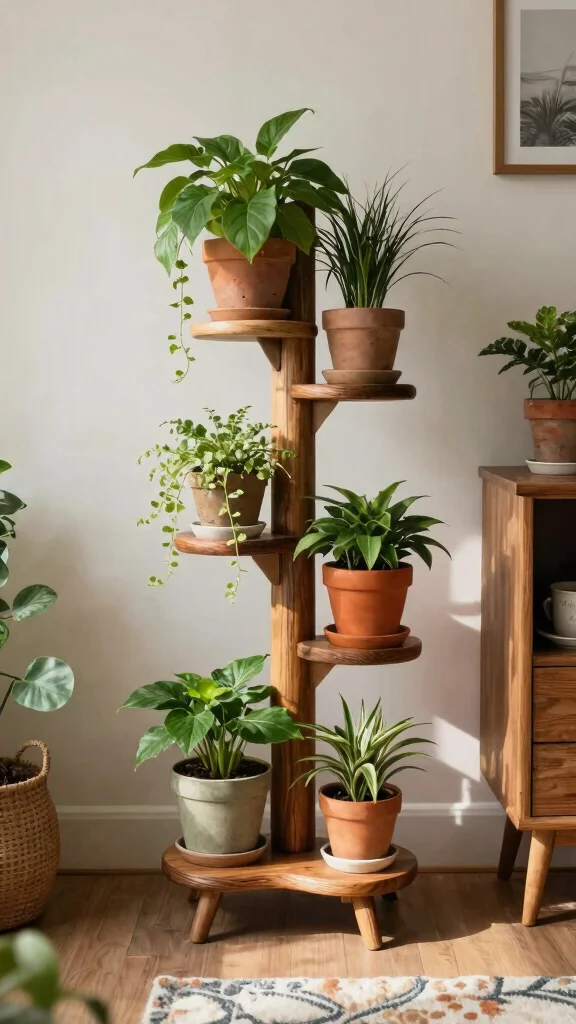
2. Minimalist Tiered Stand

For a sleek and modern touch, consider a minimalist tiered stand that elevates your plants beautifully. This design focuses on clean lines and simplicity, allowing your plants to shine without distractions. Constructing a tiered stand with multiple levels creates a stunning visual showcase, whether you choose to paint it a neutral tone or leave the wood raw for an organic vibe.
Implementing this design is easy; opt for light woods like pine to maintain an airy feel. Mixing pots of various sizes adds depth and visual interest, and adding wheels can provide mobility for easy rearranging.
Here are some tips to create your minimalist tiered stand:
– Use uniform pot colors for a cohesive look.
– Incorporate different plant types for varied textures.
– Place it near natural light for optimal growth.
This stand will beautifully organize your plants while enhancing your home’s modern aesthetic.
Minimalist Tiered Stand
Editor’s Choice

Titebond III Ultimate Wood Glue, 16-Ounces #1414

54PCS Premium Micro Sander, Detail & Mini Sander Block – Precision Sma…

10 Pieces 3.5×1.6×0.2 Inch Unfinished Wood Rectangle Board for Paintings…
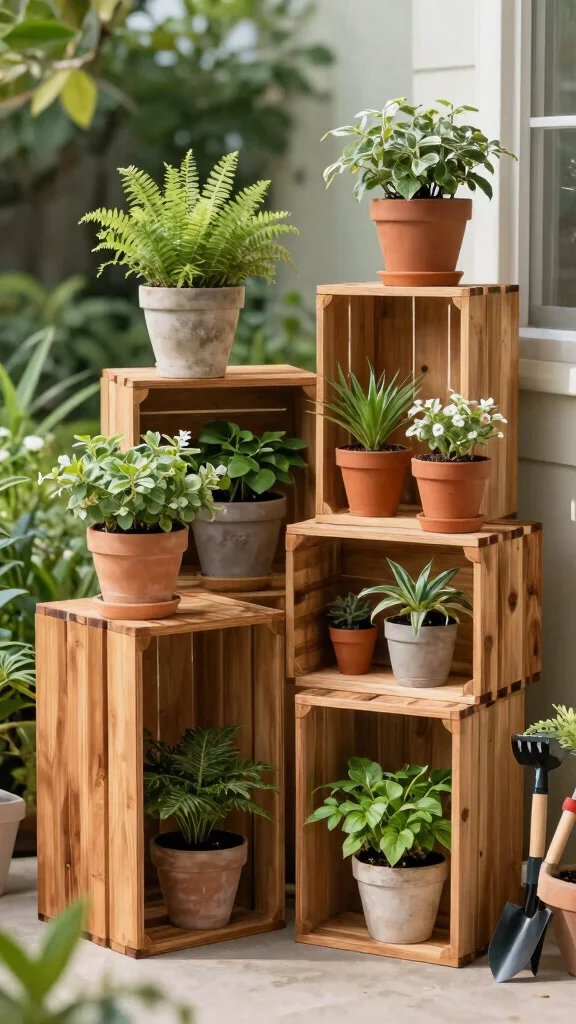
3. Crate Plant Stand

Wooden crates can be transformed into charming plant stands that add a unique character to your space. This budget-friendly project involves stacking crates to create playful vertical displays for your plants. You can choose to paint them in vibrant colors or keep them in their natural state to retain a rustic look, providing an inviting atmosphere wherever you place them.
To further enhance your crate stand, consider using crates of varying sizes for an eclectic appearance. Adding a sturdy piece of plywood as a base ensures stability, and these stands can be utilized indoors or outdoors, allowing for versatile placement.
Here are some creative ideas for your crate stand:
– Use crates as storage for gardening tools.
– Arrange them in a staggered formation for visual appeal.
– Add cushions on top for a cozy seating area.
This approach not only showcases your plants but also keeps gardening supplies conveniently organized.
Love a vertical display? DIY wood plant stand magic is in the mix: stack crates of different sizes, paint them for personality, and add a simple base to keep plants steady. It’s budget-friendly, easy to customize, and instantly elevates any nook.
Difficulty Rating & Requirements
Overall Difficulty Rating: Easy
Building a DIY wood plant stand is rated as easy. This project is perfect for beginners or anyone looking to add a bit of charm to their home without spending a fortune. You don’t need extensive woodworking skills or experience to create a functional and stylish plant stand. All you need is some basic tools and a bit of patience.
Time Estimate: ⏱ Estimated time: 2-4 hours
– Planning and Design: 30 minutes to sketch your idea and gather materials.
– Cutting and Assembly: 1.5 to 3 hours, depending on the complexity of the stand.
– Finishing Touches: 30 minutes to paint, stain, or seal the wood.
Skill Requirements:
– Required skills: Basic measuring, cutting, and assembling.
– Beginner-friendly: Yes, this project is beginner-friendly. You can learn as you go without feeling overwhelmed.
– Skills that can be learned: Measuring and cutting wood, using a drill, and applying finishes. Skills that require experience: Complex joinery or advanced woodworking techniques.
Tools & Materials Needed: 🧰 Essential items checklist
– Wood planks or pallets (required) – Choose wood that suits your style and budget.
– Measuring tape (required) – Essential for accurate measurements.
– Saw (required) – A hand saw or a power saw works well for cutting wood.
– Drill (required) – Necessary for making holes and securing pieces.
– Wood screws or nails (required) – These will hold your plant stand together.
– Sandpaper (optional) – For smoothing out rough edges.
– Paint or wood stain (optional) – Optional for adding a personal touch.
– Brush or cloth (optional) – For applying finishes to the wood.
Step-by-Step Overview:
1. Planning and Design (30 minutes): Start by sketching your plant stand and measuring the space where it will go. Choose the wood type and gather all materials.
2. Cutting and Assembly (1.5 to 3 hours): Cut the wood to your desired sizes using a saw. Assemble the pieces using screws or nails. Ensure everything is secured tightly.
3. Sanding (30 minutes): If you are using raw wood, sand down any rough edges to make it smooth and safe for handling.
4. Finishing (30 minutes): Apply paint or wood stain to enhance the look of your plant stand. Allow it to dry completely before using it.
Cost Comparison: Professional vs DIY:
Hiring a professional to create a custom wood plant stand can set you back anywhere from $100 to $300, depending on the materials and design. In contrast, making it yourself can cost around $20 to $50 for materials, especially if you use reclaimed wood or pallets. If you feel confident with the basics, tackling this DIY project can save you money and offer the satisfaction of creating something unique. If you find yourself stuck or unsure about a step, don’t hesitate to reach out to friends or local workshops for guidance!
Crate Plant Stand
Editor’s Choice
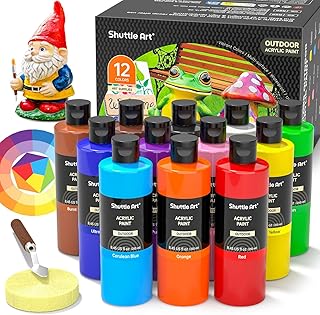
Shuttle Art Outdoor Acrylic Paint Set, 12 Colors Waterproof Paint, 8.45o…

TIMRIS Set of 3 Rustic Distressed Wood Nesting Crates, Farmhouse Decorat…
4. Pallet Garden Stand
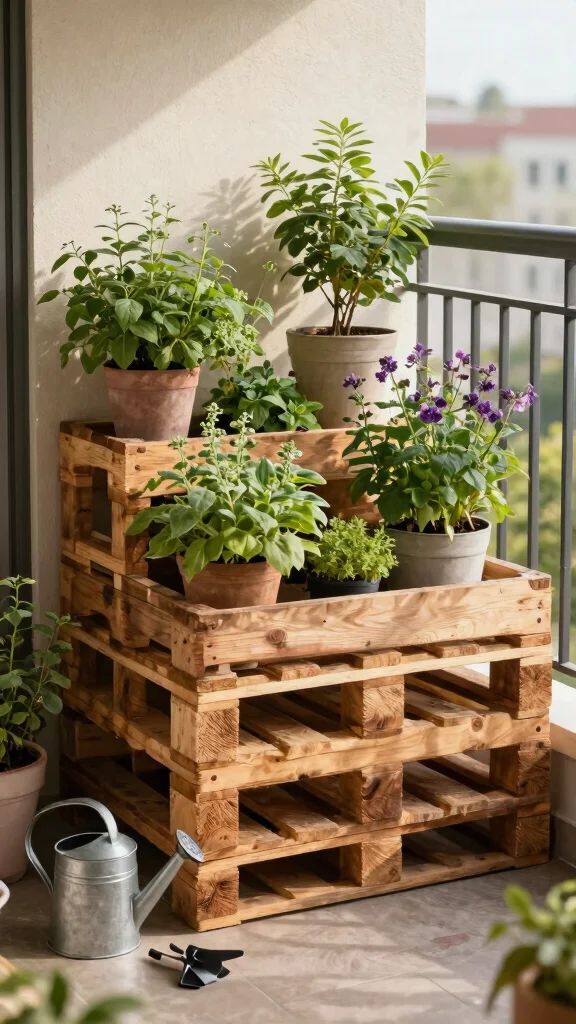
Turn an old wooden pallet into a stunning garden stand that’s both eco-friendly and visually appealing. This innovative project allows you to create a vertical garden or display your potted plants in a unique way. You can lay the pallet flat for a rustic look or prop it up against a wall to maximize space and showcase your greenery beautifully.
Finding pallets is easy and often inexpensive, making this a budget-friendly option. You can personalize it with paint or stencils, and fill the gaps with herbs or succulents for an added touch of charm.
Consider these points when creating your pallet stand:
– Create a natural look with plants spilling out.
– Use sturdy plants for better support.
– Add hooks for hanging decorations.
This design is perfect for small spaces and enhances any area with a burst of greenery.
Pallet Garden Stand
Editor’s Choice

Miracle-Gro Garden Soil All Purpose – Garden Soil for Outdoor Plants & I…

Wood Stain, 16 Oz Water Based Wood Stain and Sealer in One – No Priming,…
5. Simple Box Stand
A simple box stand is a quick and creative DIY project that adds elegance to your plant display. By stacking wooden boxes of various sizes, you can create a dynamic arrangement that draws the eye. You can personalize the boxes with paint or leave them natural for a rustic feel, allowing you to match them perfectly with your decor style.
Mixing different box sizes can provide visual interest, and ensuring proper drainage by drilling holes will help your plants thrive. These stands can also double as storage for gardening supplies, making them practical as well as stylish.
Here are some ideas to enhance your box stand:
– Arrange boxes in a zigzag for depth.
– Use vibrant colors for a playful look.
– Incorporate small lights for evening ambiance.
This versatile design encourages creativity in plant arrangement, making it a fun addition to any garden.
Building a diy wood plant stand isn’t about complexity—it’s about DIY joy. Mix different box sizes, add a few paint touches, and watch your plants thrive on a budget, turning a simple box stand into your favorite decor stash.
📹 Related Video: Scrap Wood Tiered Plant Stand
You might also like

Simple Box Stand
Editor’s Choice

Olympic WaterGuard 11 oz. Clear Exterior Waterproofing Wood Sealer Spray

DEWALT Drill Bit Set, 3-Flats Shank,14-Piece, 135 Degree Split Point, fo…
TIMRIS Set of 3 Rustic Distressed Wood Nesting Crates, Farmhouse Decorat…
6. A-Frame Wood Stand
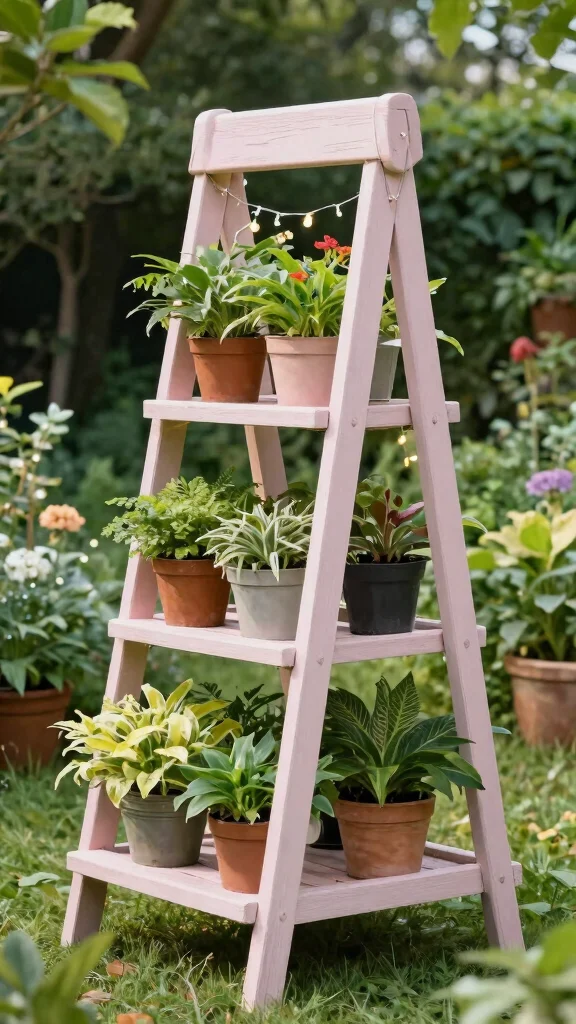
An A-frame wood plant stand offers a stylish and functional way to showcase your plants. With its triangular shape, this stand provides stability and an eye-catching design that can elevate any space. Constructing this stand requires just a few pieces of wood and basic tools, making it accessible for any DIY enthusiast.
Consider painting the frame in a vibrant color to brighten your area or mix different plant heights for a dynamic display. Adding fairy lights can bring a magical touch during the evening, enhancing the overall ambiance.
Here are some creative ideas for your A-frame stand:
– Position it near a window for natural light.
– Use pots with interesting textures to add depth.
– Incorporate seasonal decorations for a festive flair.
This stand not only serves a practical purpose but also acts as an impressive focal point in your home or garden.
Fun fact: a diy wood plant stand can be built from just 3 boards and a few screws in under 60 minutes. Its triangular shape adds stability and style, turning a simple DIY project into a standout display.
A-Frame Wood Stand
Editor’s Choice

Gorilla Wood Glue, 8 oz., Water Resistant PVA Wood Glue for Indoor & Out…

EVOLVE Paint & Primer: Environment-friendly, Low Sheen with One-coat Cov…
Scriber Gauge – Precision Marking Tool, Measuring Ruler, Layout Square…
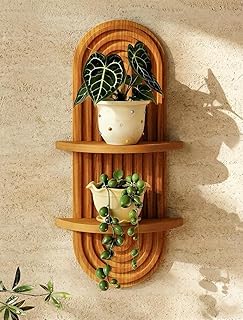
7. Recycled Furniture Plant Stand
Revive an old piece of furniture and transform it into a delightful plant stand! This DIY project invites creativity while promoting sustainability. Whether it’s an old side table, chair, or bookshelf, repurposing furniture allows you to create a personalized plant display that adds character to your space.
Consider removing some shelves or legs to adjust the height for your plants, and refinishing or repainting the piece can help it fit seamlessly into your decor. This quirky, mismatched look adds charm and personality to your home.
Here are some suggestions for your recycled furniture stand:
– Use sections to create multiple tiers for plants.
– Add wheels for easy movement.
– Incorporate decorative elements for added flair.
This project breathes new life into forgotten furniture while providing a unique touch to your plant arrangement.
Recycled Furniture Plant Stand
Editor’s Choice

24 Pcs Sanding Sponge 80-3000 Grit Sandpaper Assortment, Washable & Reus…

FolkArt Home Décor Chalk Finish Acrylic Paint, 8oz, 8 ounce, Milk Jug

12 Pack L12 x H 8″ Black Heavy Duty Shelf Brackets with Screws Metal She…
8. Vertical Wall Planter Stand
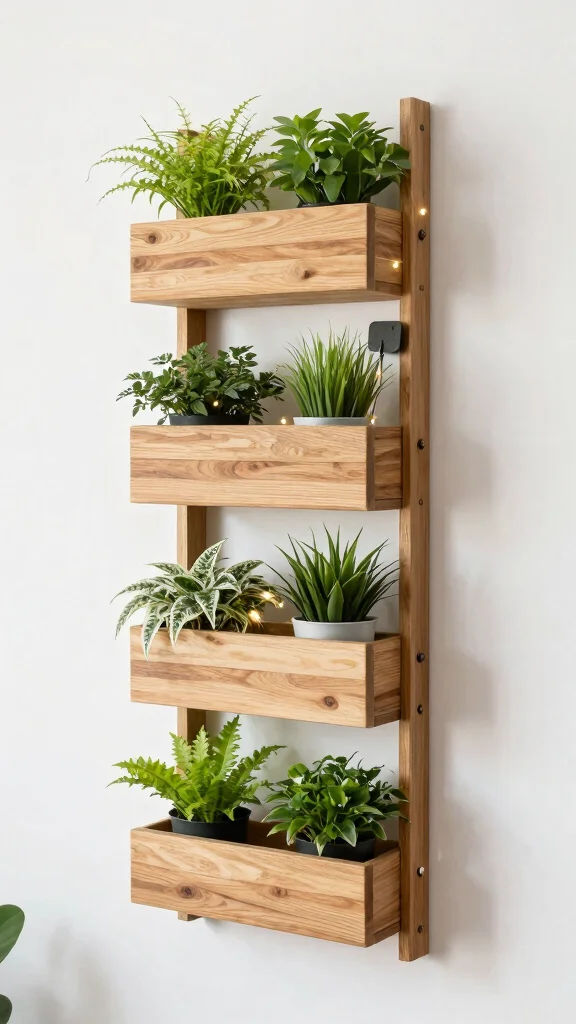
Maximize your gardening potential with a vertical wall planter stand! This innovative design enables you to hang multiple plants, saving space while creating an impressive wall display. By using wooden boards or repurposed pallets, you can craft shelves or pockets to hold your plants, making it ideal for small apartments or patios.
Ensure proper drainage for each plant to promote healthy growth, and consider mixing trailing and upright plants for added visual dynamics. Personalizing the shelves with paint or stencils can enhance your creative touch.
Here are some tips for your vertical wall planter:
– Use hooks for hanging decorations or tools.
– Incorporate a variety of plant colors and textures.
– Place it in a well-lit area for optimal growth.
This design not only maximizes your gardening space but also serves as a beautiful living decor feature for your walls.
You Might Also Like


Vertical Wall Planter Stand
Editor’s Choice
Bamworld Boho Wall Decor Brown Plant Wall Shelf Mid Century Modern Decor…

DEWALT 20V Max Cordless Drill Driver Set, 2 Speed, High Performance Moto…

Utopia Home Plant Pots Indoor with Drainage Holes – Set of 5 White Pla…
9. Garden Bench Plant Stand
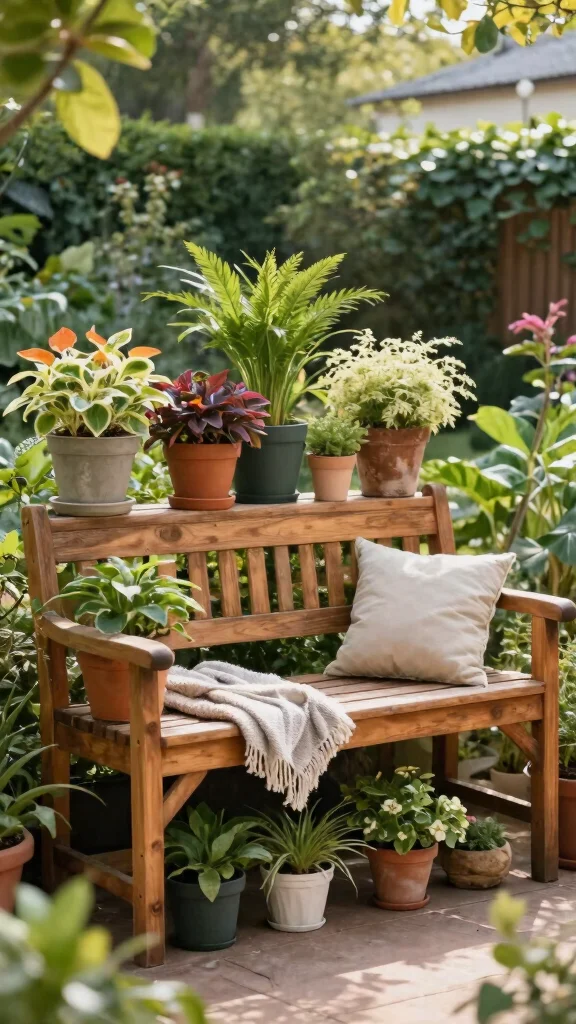
Create a multifunctional garden bench that doubles as a plant stand, combining style and practicality beautifully. This project offers a cozy seating area while showcasing your favorite plants, enriching your outdoor experience. By constructing a simple bench using weather-resistant wood, you can ensure durability and incorporate spaces for pots, either underneath or on top.
For added flair, consider using bright colors to make the bench stand out, or adding cushions for extra comfort. This design is perfect for displaying larger plants or groupings of smaller ones, enhancing your garden’s overall look.
Here are some ideas to elevate your garden bench stand:
– Incorporate storage underneath for gardening supplies.
– Use varied plant heights for an eye-catching display.
– Add decorative elements like lanterns for ambiance.
This dual-purpose design seamlessly blends functionality with style, making it a wonderful addition to any outdoor space.
Garden Bench Plant Stand
Editor’s Choice
Ready Seal Exterior Wood Stain | Semi-Transparent Oil-Based Formula | Pr…

Wolman 1904A WOODLIFE CopperCoat Green Wood Preservative, Quart

Summsun Outdoor Chair Cushions Set of 4, Faux Linen Patio Furniture Cush…
Conclusion

Creating your own DIY wood plant stands doesn’t just beautify your home or garden; it also brings joy and satisfaction to your gardening journey. With these budget-friendly ideas, you can craft unique and charming displays that showcase your plants beautifully. From rustic ladder stands to vertical wall planters, each project allows you to express your style without exhausting your wallet.
Which stand are you excited to try? Gather your materials, unleash your creativity, and enjoy the process of bringing a little more green into your life!
Note: We aim to provide accurate product links, but some may occasionally expire or become unavailable. If this happens, please search directly on Amazon for the product or a suitable alternative.
This post contains Amazon affiliate links, meaning we may earn a small commission if you purchase through our links, at no extra cost to you.
Frequently Asked Questions
What’s the easiest way to start a diy wood plant stand that costs almost nothing?
Kick off your project with a simple plan and thrifted wood. Measure your plant pot, sketch a small top, then cut 3–4 legs and a basic top from scrap lumber or an old pallet. A simple 3- or 4-leg frame works for most pots. Glue the joints, add a few inexpensive screws, and clamp until dry. Sand to smooth any rough edges, then seal with a cheap outdoor finish or mineral oil to protect against moisture. This is a practical wooden plant stand tutorial in action and a classic example of budget-friendly gardening projects and cheap plant stand ideas you can finish this weekend.
What materials help keep costs low when building a wooden plant stand?
Look to reclaimed lumber, scrap boards, or pallet wood to cut costs. Choose lightweight stock like 1x2s or 2x2s for a small stand, and fasten with wood glue plus inexpensive screws. If you want mobility, add cheap caster wheels. Finish with a straightforward sealant to protect against moisture. This approach fits budget-friendly gardening projects and cheap plant stand ideas, while letting you try a homemade plant holder without breaking the bank.
How should I size and design a diy wood plant stand for a small space or vertical garden?
Start by measuring your pot’s base and planning a compact footprint. For vertical impact, consider a 2–3 shelf stand or a tall single-column design that doesn’t hog floor space. Typical options range from about 12–18 inches tall for tabletop pots to 2–3 feet for larger displays. Add cross braces or a diagonal back rail to improve stability on uneven surfaces. With a clear plan, you’ve got a wooden plant stand tutorial you can tailor into easy DIY garden decor and budget-friendly gardening projects.
What maintenance tips help a wooden plant stand last outdoors and stay sturdy?
Seal the wood for outdoor use and keep the stand off damp ground with simple feet or pads. Wipe down dust and plant debris regularly, and reapply sealant every year or two depending on exposure. If you used pallets, sand rough edges first to avoid splinters. With proper care, your stand remains a practical piece of easy DIY garden decor and continues to support your plants without breaking the bank.
Can I adapt a diy wood plant stand for heavier pots or multiple plants?
Absolutely. Use thicker stock (like a sturdier top and stronger legs) or add a bottom shelf and cross-bracing to distribute weight more evenly. If you’re testing with heavy pots, check the weight by placing a full pot on the stand and testing stability before committing. A well-built option can grow into a larger homemade plant holder and still be a budget-friendly gardening project that scales with your needs.
Related Topics
diy wood plant stand
budget-friendly gardening
cheap plant stand ideas
homemade plant holder
wooden plant stand tutorial
easy DIY garden decor
vertical gardening
sustainable gardening
beginner friendly
outdoor decor
affordable home projects
crafting with wood