
When the weather warms up, I start craving a beautiful outdoor space filled with lush greenery. There’s something magical about stepping into a yard transformed by vibrant plants and creative garden decor. If you feel the same way and want to breathe new life into your outdoor areas, you’ve landed in the right place.
This post is for garden enthusiasts, DIY lovers, and anyone looking to elevate their outdoor space without a hefty budget. Whether you’re a seasoned gardener or just beginning to explore outdoor gardening ideas, you’ll find inspiration here. I pulled together nine DIY plant stands that are practical, stylish, and guaranteed to transform your yard overnight.
These projects are not only fun to make, but they also offer a fantastic way to showcase your favorite plants in a creative manner. From rustic pallets to modern metals, there’s something here for everyone. Get ready to dive into simple yet effective plant stand tutorials that will enhance your garden decor and make your outdoor space the envy of the neighborhood!
Key Takeaways
– Explore nine unique DIY outdoor plant stands that cater to various styles and preferences.
– Learn how to repurpose materials like pallets, ladders, and tires for sustainable gardening solutions.
– Discover step-by-step tutorials that make each project easy to follow, even for beginners.
– Gain insights into integrating vertical gardening solutions into your existing landscape.
– Find tips on decorating your plant stands to enhance your overall garden aesthetics.
1. Rustic Pallet Plant Stand
Looking to add a touch of rustic charm to your garden? A pallet plant stand is an easy and stylish way to display your favorite plants. You can leave the wood natural for a classic look or splash on some bright paint to match your outdoor decor. This DIY project is not only simple but also a great conversation starter in your yard!
Begin by sourcing a sturdy wooden pallet that is free of damage. Then, sand it down to eliminate splinters and rough edges. Decide whether you want a vertical or horizontal arrangement to best suit your space. Finally, fill it with an array of pots for visual depth and interest.
Key steps to create your pallet stand:
– Choose a sturdy, undamaged wooden pallet
– Sand down rough edges for safety
– Arrange pots of various sizes for visual appeal
– Place it in a sunny spot for optimal growth
This rustic stand brings warmth to your garden, making it perfect for showcasing everything from herbs to beautiful blooms. You’ll love how it transforms your outdoor space effortlessly!
Rustic Pallet Plant Stand
Editor’s Choice

Reclaimed Wood Pallet Sign Blank -DIY Art – Made in the USA (12×18)

Romeda 8-Pack Sanding Sponge, Four Grits Per Pack 60/80/120/220, Washabl…

Thompson’s WaterSeal Multi-Surface Waterproofer Stain, Clear, 1 Gallon
2. Tiered Vertical Plant Stand
Want to maximize your gardening space? A tiered vertical plant stand is your answer! This design not only saves ground space but also creates an eye-catching display with layers of plants. You can easily customize it to fit your style and space needs.
Start by gathering materials like reclaimed wood or sturdy boards for a rustic feel. Cut the boards into varying lengths to create different tiers. Assemble these tiers securely using nails or screws, and finish with your choice of paint or stain to match your garden’s theme.
Get started with these steps:
– Gather materials like wood boards for tiers
– Cut boards to different lengths for a layered look
– Securely assemble the tiers with nails or screws
– Paint or stain to match your garden aesthetic
This vertical stand transforms small spaces into lush retreats. Enjoy a vibrant garden without taking up valuable ground area!
Tiered Vertical Plant Stand
Editor’s Choice

376pcs Premium Hardware Nails Assortment Kit, Maximum Length 2 Inches Ga…

Bright Creations Shelf Wood Boards – 3.5 x 12 x 0.5 in, 6-Pack Reclaimed…

unuaST Outdoor Acrylic Paint Waterproof Set, 10 Colors Large Bulk Outdoo…
3. Upcycled Ladder Plant Stand
Have an old ladder gathering dust? Turn it into a charming plant stand with a little creativity! This budget-friendly project adds a whimsical touch to your outdoor area while showcasing your plants beautifully.
Start by finding a sturdy ladder that can support your plants. Sand it down if needed, and paint it for a fresh look. Use the rungs to display pots at different heights, allowing trailing plants to flow naturally. You might even add fairy lights to create a magical ambiance at night.
Steps to create your ladder stand:
– Find a sturdy old ladder
– Sand and paint it for style
– Use rungs to display pots at varying heights
– Add decorative lights for a night-time glow
This stand is perfect for trailing plants like pothos or ivy, making it a delightful feature in any garden space. You’ll love how it elevates your outdoor decor!
📹 Related Video: Making A Ladder Plant Stand
Upcycled Ladder Plant Stand
Editor’s Choice
Romeda 8-Pack Sanding Sponge, Four Grits Per Pack 60/80/120/220, Washabl…
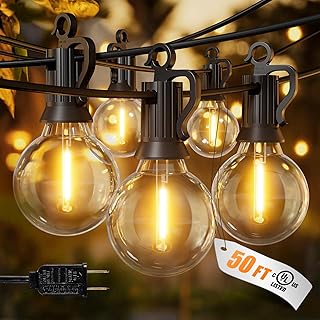
Brightown Outdoor String Lights, 50FT 25 G40 Bulbs Shatterproof Patio Li…

Quarut Large Plastic 3 Pack16 inch Plant Pots,Whiskey Barrel Planters wi…
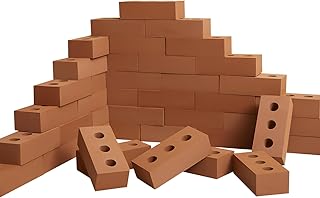
4. Concrete Block Plant Stand
Looking for a modern touch in your garden? A concrete block plant stand offers a sleek, industrial vibe that is both durable and weather-resistant. This stand not only looks great but is also incredibly functional.
To create your own, start with concrete blocks available at most home improvement stores. Arrange them in a formation that complements your space, either in a single row or stacked for height. Fill the openings with your favorite pots to display a variety of plants.
Follow these steps to build your concrete block stand:
– Purchase concrete blocks from a home improvement store
– Arrange blocks in a row or stack for height
– Fill openings with pots or planters
– Optional: Paint or decorate blocks for a personal touch
This stand is ideal for showcasing succulents or colorful annuals, adding a striking contrast to your greenery. It’s a practical choice that enhances your garden’s aesthetic effortlessly!
People want a modern yard that feels effortless. A concrete block plant stand nails that vibe—durable, affordable, and perfect for diy plant stand outdoor setups, turning vertical gardening into a quick, satisfying win.
Concrete Block Plant Stand
Editor’s Choice
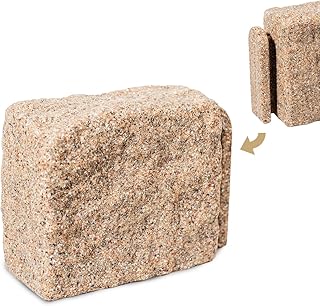
Beuta Faux Stone Starter Block – 7″ L x 4″ W x 6.5″ H – DIY Dig-Free…

DeeCoo 3 Piece Ceramic Plant pots Indoor Pots Set with Drainage Holes, 5…
5. DIY Cinder Block Planter
Want a trendy garden feature? A DIY cinder block planter is a unique way to elevate your plants and enhance your garden’s design. This project is fun and creates a visually appealing display that will catch everyone’s eye.
Begin by gathering several cinder blocks and arranging them in your preferred layout, either horizontally or vertically. Fill the cavities with soil and your chosen plants, allowing them to spill out beautifully. You can paint the blocks for a pop of color or leave them raw for a rustic look.
Steps to create your cinder block planter:
– Gather cinder blocks for your design
– Arrange blocks either horizontally or vertically
– Fill cavities with soil and plants
– Paint blocks for added style or keep them natural
This stand is perfect for herbs or colorful flowers, offering a fun way to brighten your outdoor space. You’ll love the creativity it brings to your gardening!
Want a stylish diy plant stand outdoor feature fast? A DIY cinder block planter transforms bland corners in hours. Stack blocks, fill with soil and plants, then paint for a pop of color—easy, affordable, and totally shareable.
You might also like
DIY Cinder Block Planter
Editor’s Choice

KILZ Decorative Concrete Coating, Slip-Resistant Gray Paint with Stone-L…

Miracle-Gro Organic Outdoor Potting Mix – Plant Soil for Outdoor Contain…
Zhanmai 50 Pack Foam Bricks Building Blocks for Kids Foam Cinder Blocks …
6. Hanging Plant Stand
Elevate your gardening game with a charming hanging plant stand! This design not only adds vertical interest but also frees up ground space for other uses. Perfect for smaller areas, it brings a stylish touch to your outdoor decor.
To create your own, start with a sturdy base like a wooden board or metal rod. Use ropes or chains to suspend pots at different lengths for a dynamic look. Macramé hangers can add a bohemian flair, enhancing the design even more.
Key steps for your hanging plant stand:
– Use a sturdy base like a wood board or metal rod
– Suspend pots using ropes or chains
– Add macramé hangers for a unique touch
– Arrange trailing plants for a stunning display
This stand works beautifully on patios or balconies, allowing cascading plants like ferns or spider plants to shine. You’ll enjoy a fresh perspective on your outdoor space!
Hanging Plant Stand
Editor’s Choice

Shappy 2 Pack Jute Crochet Long Plant Hanger for 3 Inch to 12 Inch Pots,…

6 Pack 6 Inch Wall Plant Holder,Metal Plant Hanger Indoor,Wall Planters …
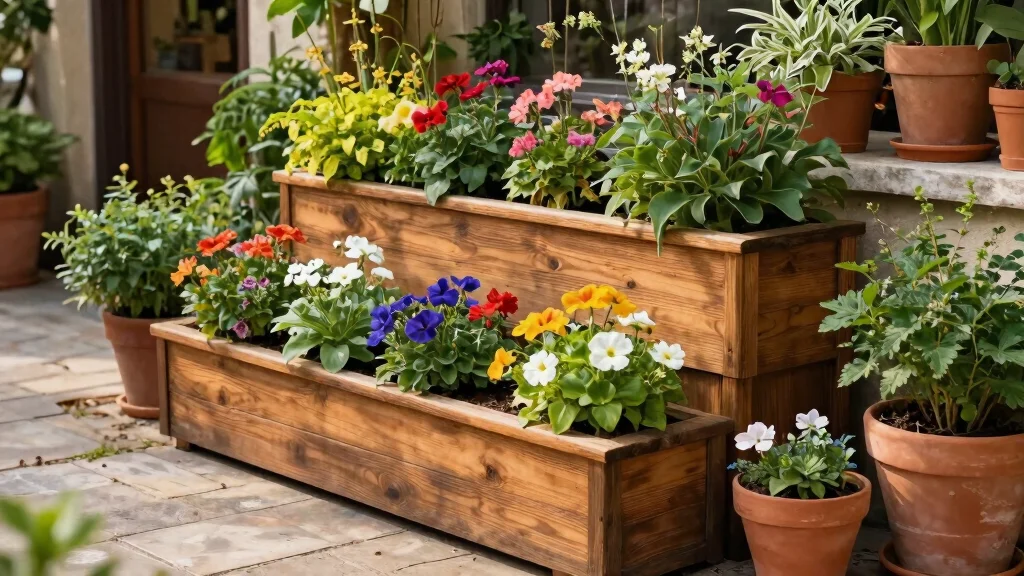
7. Reclaimed Wood Planter Boxes
Bring rustic charm to your garden with reclaimed wood planter boxes! These eco-friendly projects add character while giving your plants a stylish home. Not only are they attractive, but they also promote sustainability in your gardening.
Start by sourcing reclaimed wood, like pallets or barn wood, ensuring it’s safe for plants. Cut the wood into the desired sizes to form boxes, then assemble securely with nails or screws. Don’t forget to add drainage holes for healthy plants!
Steps to create your reclaimed wood boxes:
– Source safe reclaimed wood like pallets
– Cut wood into sizes for rectangular boxes
– Assemble boxes with nails or screws
– Add drainage holes for plant health
These boxes can be customized with paint or stains, making them perfect for any garden style. You’ll love how they elevate your outdoor space beautifully!
Reclaimed Wood Planter Boxes
Editor’s Choice

My Barnwood Frames Reclaimed Wood Planter Box with Metal Brackets (Small…

DEWALT Drill Bit Set, 3-Flats Shank,14-Piece, 135 Degree Split Point, fo…

Deluxe Wood Carving Kit, 25 Piece Wood Carving Tools with Thick Leather …
8. Modern Metal Plant Stand
For a chic addition to your garden, consider a modern metal plant stand! These stands are available in various shapes and sizes, easily matching any contemporary outdoor theme. They provide a stylish way to display your plants while ensuring durability against the elements.
Creating your own is straightforward. Use metal pipes or sheets, or repurpose old metal furniture for a unique touch. Choose a design that complements your pots, whether round, square, or even asymmetrical. You can also paint the metal for a personalized finish.
Steps to craft your metal stand:
– Use metal pipes or sheets for sturdiness
– Repurpose old metal furniture if available
– Design to match your pot shapes
– Paint for a custom look if desired
This stand is perfect for showcasing modern plants like snake plants or succulents, adding a sleek touch to your garden. You’ll appreciate the stylish display it brings!
You Might Also Like


Difficulty Rating & Requirements
Overall Difficulty Rating: Medium
Creating your own outdoor plant stand can be a fun challenge, but it isn’t without its hurdles. The medium difficulty rating means it’s perfect for individuals who have some basic DIY experience but aren’t necessarily experts. If you enjoy hands-on projects and are keen to learn new skills, this is a great way to enhance your yard with unique decor.
Time Estimate:
⏱ Estimated time: 3-5 hours
The time needed varies depending on the type of plant stand you choose to construct. For instance, a rustic pallet stand can take about 3 hours, while a more complex tiered vertical plant stand might take up to 5 hours. Remember to account for drying time if using paint or sealant.
Skill Requirements:
– Required skills: Basic woodworking, measuring, and assembling
– Beginner-friendly: Yes, with some guidance
– Many skills can be learned during the process. Basic measuring and cutting techniques are easy to pick up. However, projects requiring precise cuts or advanced techniques may need prior experience.
Tools & Materials Needed:
🧰 Essential items checklist:
– Wood pallets (required)
– Saw (required)
– Drill (required)
– Sandpaper (required)
– Paint or wood stain (optional)
– Measuring tape (required)
– Level (optional)
– Wood screws (required)
Step-by-Step Overview:
1. Planning and Design (1 hour): Outline what type of plant stand you want, measuring your space to ensure it fits.
2. Gathering Materials (1 hour): Collect all necessary items from your local hardware store or online. Make sure to check if you have the essential tools at home.
3. Construction (1-3 hours): Cut your materials based on your design and assemble. This phase can take longer if you’re creating a more complex structure.
4. Finishing Touches (1 hour): Sand down any rough edges, paint, or stain your stand, and let it dry before placing your plants.
Professional vs DIY:
Rough cost comparison: Hiring a professional to build a custom plant stand might set you back around $200-$500 depending on the complexity. In comparison, a DIY project can cost as little as $50-$100 for materials, making it a budget-friendly option. If you enjoy crafting and have the time, a DIY project is a rewarding way to personalize your outdoor space while saving money. If you’re unsure about your abilities or want a flawless finish, hiring a professional might be the better route.
Modern Metal Plant Stand
Editor’s Choice

Airpark Plant Stand Indoor Adjustable, Metal Modern Plant Stands, Heavy …

Bamworld Outdoor Plant Stand Metal Plant Stand Indoor Corner Plant Stand…
9. Colorful Tire Planters
Looking to add a playful vibe to your garden? Colorful tire planters are a fun and eco-friendly way to repurpose old tires while injecting a splash of color into your outdoor space. This creative project is perfect for families, encouraging kids to get involved in gardening.
Start by cleaning old tires thoroughly, then apply weather-resistant outdoor paint in bright colors. Stack or arrange them in a design that suits your garden, and fill each tire with soil and a variety of plants, from flowers to herbs.
Steps to create your colorful tire planters:
– Clean old tires to remove dirt
– Use outdoor paint for vibrant colors
– Arrange stacked or in a fun design
– Fill with soil and your favorite plants
This whimsical design is excellent for kids’ gardens, turning discarded items into vibrant displays that inspire creativity. You’ll love how it brightens your outdoor area!
Did you know upcycled tire planters can last 5+ years with weatherproof paint and cost 80% less than store-bought planters? DIY plant stand outdoor projects like these empower families to colorfully grow a thriving garden together.
Colorful Tire Planters
Editor’s Choice

Burpee, 9 Quarts | Premium Organic Potting Natural Soil Mix Food Ideal f…

Bamllum Leather Gardening Gloves for Women – Working Gloves for Weeding,…

DecoArt Patio Outdoor Paint Set – 9 Neon & Metallic Colors (2 fl oz Bo…
Conclusion
Incorporating DIY outdoor plant stands into your gardening routine can significantly elevate the beauty and functionality of your outdoor spaces. Each of the ideas shared today allows for personal expression and adds unique charm, whether you prefer rustic, modern, or playful designs. Embrace your creativity and transform your yard into a garden sanctuary that reflects your style.
So grab your materials, roll up your sleeves, and let your imagination run wild with these outdoor planter projects. Your plants will thank you, and your garden will become a true work of art!
Note: We aim to provide accurate product links, but some may occasionally expire or become unavailable. If this happens, please search directly on Amazon for the product or a suitable alternative.
This post contains Amazon affiliate links, meaning we may earn a small commission if you purchase through our links, at no extra cost to you.
Frequently Asked Questions
What are some easy DIY outdoor plant stand ideas you can start today?
Kick off your diy plant stand outdoor project with a simple plan. Start by selecting a spot with the right light, then pick a design like a wooden pallet stand, stacked blocks, or rustic crates. Gather exterior-grade screws, sealant or outdoor paint, and a drill. Then: measure, cut to size, assemble, seal or paint, and let it dry. Place your pots and water as needed to keep plants happy. This quick setup is a perfect way to explore vertical plant stand ideas and other outdoor planter projects.
How can I create a vertical plant stand that fits a small balcony or corner?
Think vertical from the start. Choose a compact design like a leaning ladder, wall-mounted shelves, or stacked crates that can hug a balcony or corner. Key steps: measure available width and height, anchor to a wall stud or use sturdy freestanding legs, distribute weight evenly across shelves, and choose weatherproof materials or a weatherproof coating. Finish with drainage planning and smart pot placement so plants thrive. This approach makes vertical plant stand work for limited spaces and taps into outdoor gardening ideas and garden decor DIY vibes.
What are the best materials for durable outdoor plant stands and how do I protect them from weather?
Go with weather-ready materials: cedar or redwood for wood that resists rot, pressure-treated lumber, powder-coated metal (aluminum or galvanized steel), or sturdy plastics. Practical tips: choose materials rated for outdoor use, seal all edges and joints with exterior sealant, paint or stain with a UV-protective finish, and add drainage and a tray to prevent water buildup. Use rust-resistant screws and corrosion-proof fasteners. Regularly inspect and re-seal every season to keep your diy plant stand outdoor looking sharp and lasting longer.
Any tips for promoting garden decor DIY with plant stands and color coordination?
Absolutely. Start with a plan and a cohesive color palette that complements your yard. Vary heights and textures to create visual interest and group plants by sun/shade needs. Use color pops on the stand itself—paint in a contrasting shade or apply a two-tone stain—to make the arrangement feel intentional. Pair stands with other outdoor planter projects and keep a balance of outdoor gardening ideas for a polished garden decor DIY look.
What common mistakes should I avoid in plant stand tutorials and outdoor planter projects?
Common mistakes: underestimating weight load and choosing weak fasteners, skipping weatherproofing, ignoring drainage, placing stands where water pools or gets bumped, and failing to measure planter sizes before building. Fix by calculating the total weight, using weight-rated fasteners, sealing joints, adding a drainage tray, and anchoring taller units to prevent tipping. By planning ahead and following safe plant stand tutorials and outdoor planter projects, you’ll avoid costly reworks and keep your outdoor space thriving.
Related Topics
diy plant stand outdoor
vertical gardening
garden decor DIY
outdoor planter projects
easy DIY
beginner friendly
upcycled materials
creative plant stands
backyard transformation
seasonal gardening
patio decor
outdoor living